
Quick Start Guide (Traveler)
This article will walk you through the unboxing of your Traveler and will cover creating your first draft, connecting to Wi-Fi, and creating a Postbox account.
Click for a video walkthrough on how to use Traveler like a pro.
Download the PDF version of the Traveler User Manual.
1. Turn on Traveler.
Turn on your Traveler by pressing the red power button in the center of the device.

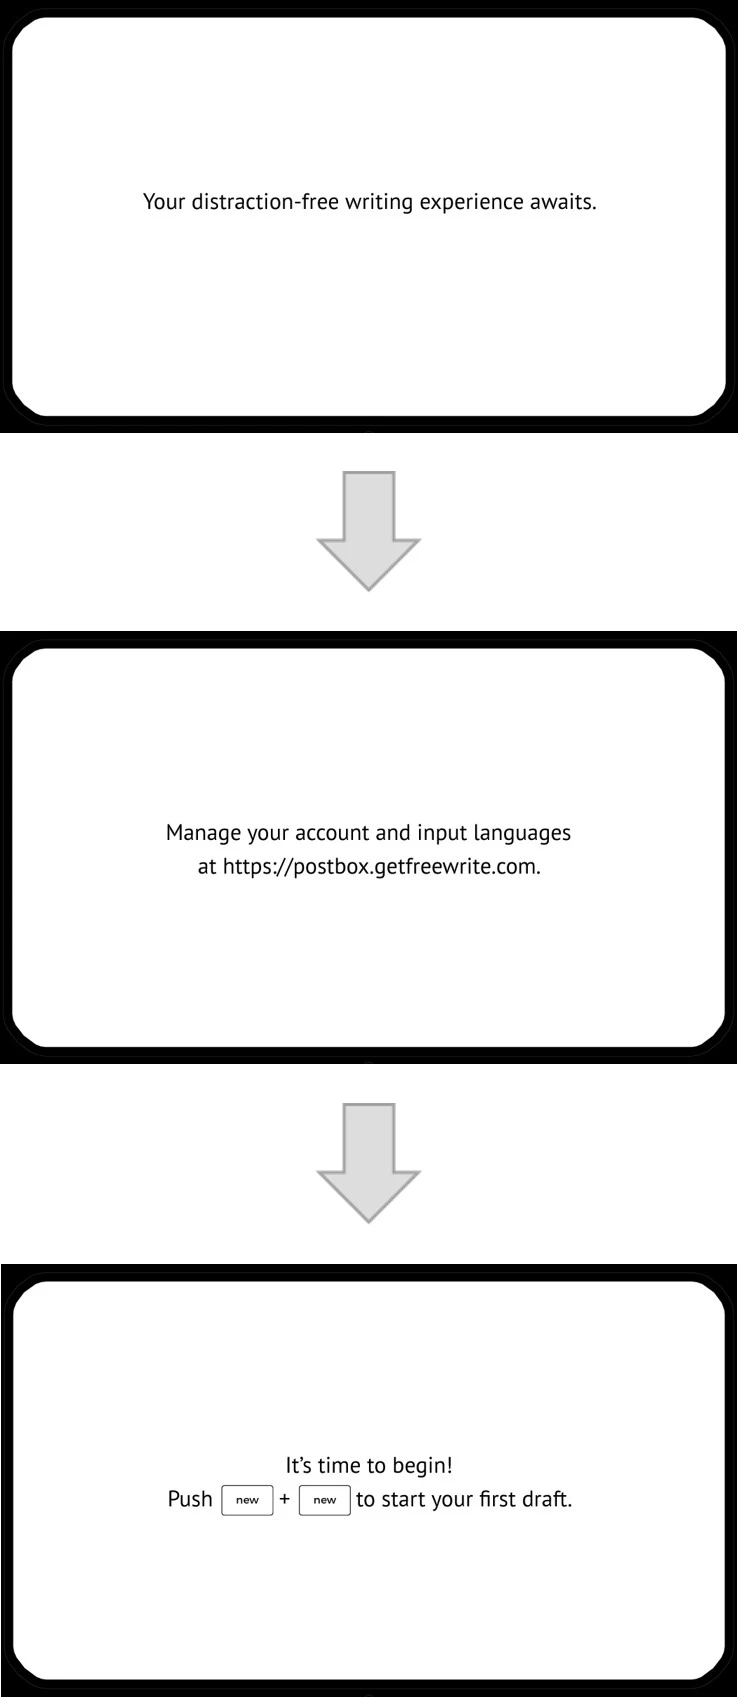
2. Start your first draft.
Traveler will boot directly into the below starting sequence. Follow the onscreen prompts to begin writing immediately. Pressing [new] and [new] will create your first draft.
You can set up your Wi-Fi connection and cloud syncing now by continuing to Step 3 below. However, if you'd prefer to begin writing immediately, you can set up Wi-Fi at a later time, and all work will be saved internally to your Traveler until then.
3. Turn on Wi-Fi.
To have your work sync to the cloud, you will need to connect your Traveler to Wi-Fi and then set up your Postbox account. (Postbox is Freewrite's complimentary web app that helps you manage your documents and device settings.)
First, press the Wi-Fi "new" button at the top right corner of your keyboard. The screen will update to show available networks.

4. Connect Traveler to Wi-Fi.
Select a network with the number keys or use [pg dn] or [pg up] to see more networks. If connecting to a secure network, you will be prompted to enter a password.

5. Connect Traveler to Postbox for the first time.
Once you’re successfully connected to Wi-Fi, you will be prompted to enter an email address.
If you are a new user: Enter the email you would like to be associated with your Postbox account. It will be the email you use to log in. In order to confirm your email, you will be prompted to repeat your email address. The device will then automatically connect to your new Postbox account, and a link to complete Postbox setup will be sent to your email address.
If you already have a Postbox account from a previous device: Simply sign in now. All your drafts from both devices will sync to the same Postbox account.

6. Set Wi-Fi to "on."
After the Postbox confirmation, a successful Wi-Fi connection prompt will appear. To keep your Wi-Fi setting on, press the "on" button at the top right corner of your keyboard.

7. Log in to Postbox with your unique link.

8. Write on.
Now you're ready to write! The drafts on your Freewrite will automatically sync to Postbox.
You can visit Postbox any time to manage your drafts, adjust the settings on your Freewrite device, or try out Freewrite Plus.
For information on syncing to third-party cloud services and other functionalities, check out our expansive Knowledge Base.
Questions?
Reach out to our support team at hello@getfreewrite.com with any questions or obstacles you encounter. We can't wait to see how Freewrite pushes your creative process forward!